
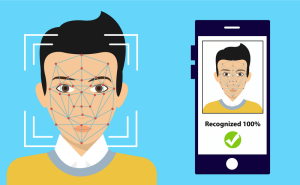
Face Recognition
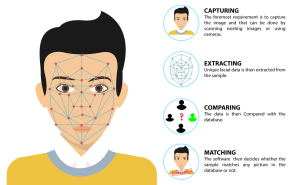
Face recognition systems allow programs to identify a person by analyzing the face landmarks of her/his face in a digital image.
- When a face is analyzed, its geometrical properties, size, and position are obtained.
- A structure is generated that forms a pattern that is later stored in a database.
- Once stored, the user’s facial record is compared with the biometric features of each face that is scanned and allows adding new templates to make the recognition more effective.
- If the image matches a search, the system will alert us that a match has been found.
Face Recognition Application
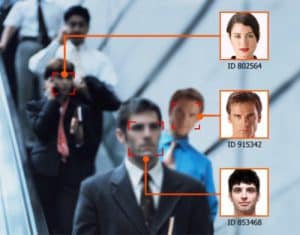
- Face recognition is used to detect faces in real-time for surveillance and tracking persons or objects.
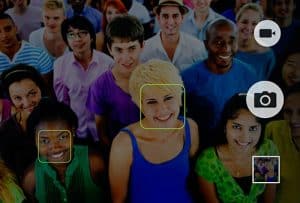
- It is widely used in cameras to identify multiple appearances within one frame such as in mobile phone cameras and DSLRs.
- Facebook also uses a face detection algorithm to detect faces in the images and recognize them.

- Modern phones have a face unlock feature which recognizes the face and checks whether it is authorized for access or not.
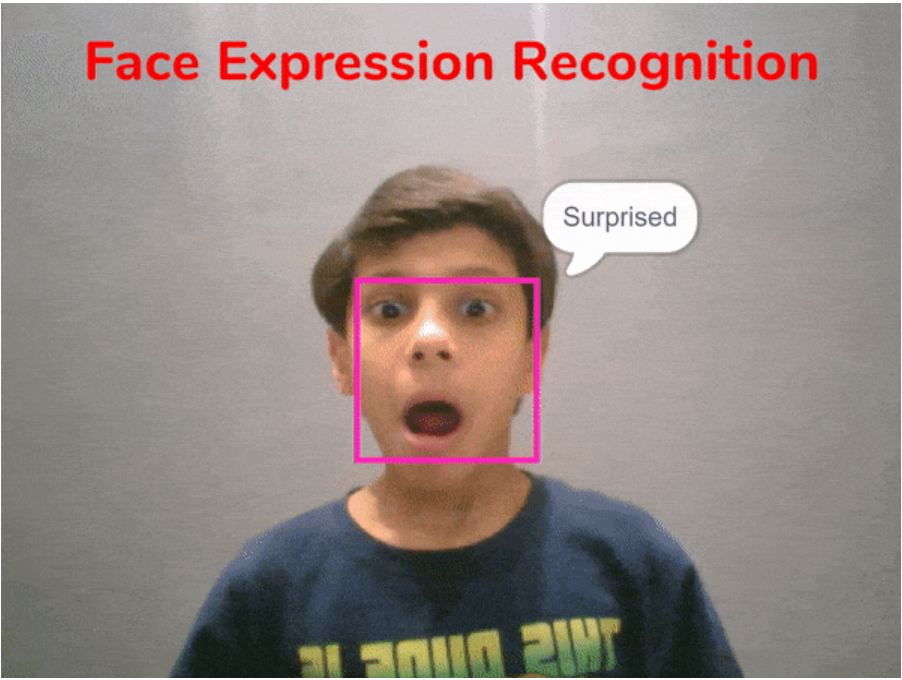
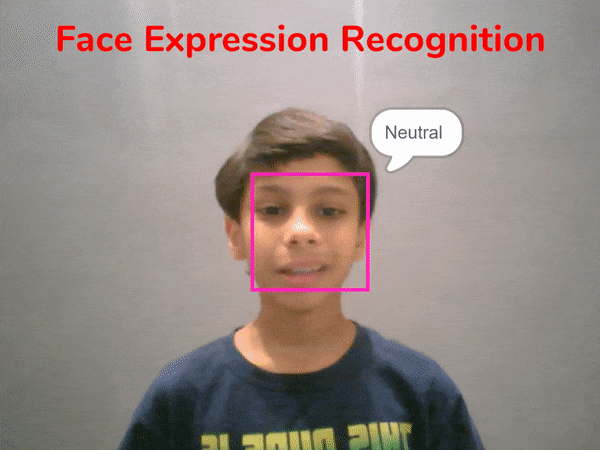
In this project, we will make a script that detects the face using the camera and reports the expression the faces detected on the stage.
Let’s begin!
Setting Up the Stage
- Open PictoBlox and create a New File.
- Select the coding environment as Block Coding.
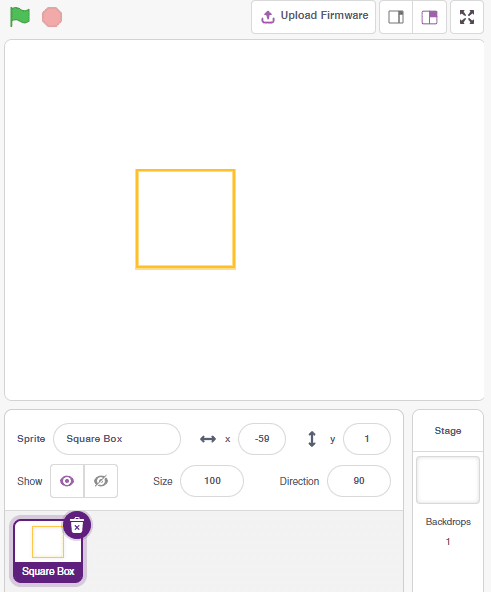
- Add a new Square Box sprite and delete the Tobi Sprite.

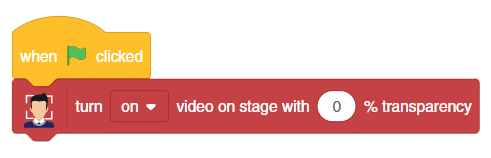
- Drag and drop a when flag clicked block into the scripting area.
- Add Face Detection Extension.
- Snap a turn () video on stage with () transparency block from the Face Detection palette. Change the camera option to on and transparency to 0%.
The stage is set. Click the green flag to get the camera feed on the stage.
Recognize Image
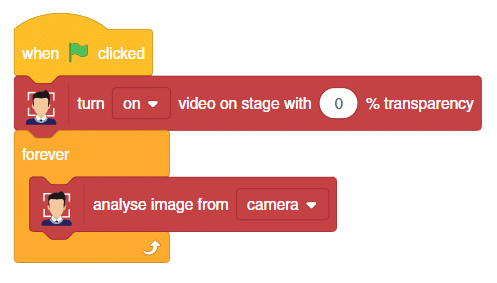
- We will continue with the same script.
- Add a forever block from the Control palette.
- Snap a analyse image from () block. Select the feed as the camera.
Display Emotions and Tracking
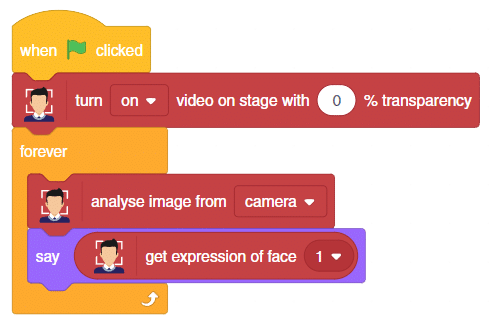
- Add a say () block. Add a get expression of face () block in the input. Add the Face reporter block in the face number input.
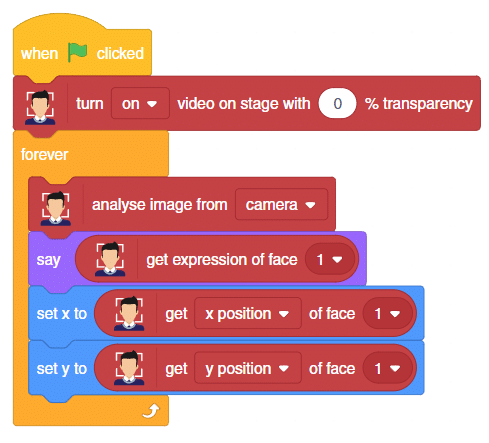
- Then, add a set x to () block. Add a get () of face () block in the input. Change the parameter to the x position and add the Face reporter block in the face number input.
- Next, add a set y to () block. Add a get () of face () block in the input. Change the parameter to the y position and add the Face reporter block in the face number input.
- Snap a set size to () % block from the Looks palette.
- Next, add get () of the face () block from the face detection palette. Select the parameter as width and add the Face reporter block in the face number input.
- Save the file with the name Face Expression Detector.
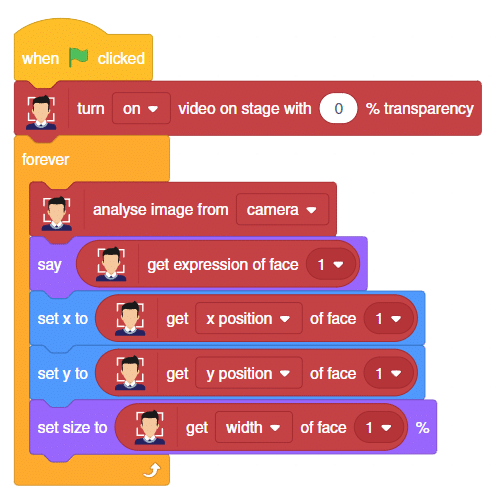
Your script is now complete.
Click the green flag to start the script.
Assignment
Before you move on to the next lesson, a small assignment awaits you!
You must upload the PictoBlox program you created in this activity to the website. Submitting the assignment is a must in order to receive the certificate after completing the course.
Follow the steps below to upload your assignment:
- Click on Browse.
- Search and Select your saved Project file(.sb3) and Click Open.
- Click on Upload to submit the assignment.

The file type allowed is the SB3 file generated from the PictoBlox program. The maximum file size allowed is 5 MB.
Good luck!