
Let’s talk variables. But before what, let’s have a look at why we need variables.
Why Do You Need Variables?
You’ve thrown a party in which the menu consists of your famous soup and noodles. As your guests relish the soup, you go to the kitchen to ready the noodles. You suddenly realize that you don’t have enough clean bowls to serve the noodles! You grab the dirty ones and clean them quickly. You use the bowls previously used to serve soup to serve the noodles too. Day saved!
What are Variables?
The bowls at the party were used for serving different things. In computer programming terms, they are what are known as variables.
A variable is something that can take or store different values as the program is executed.
Just as the same bowl is used to store different things, a variable is used to store different values such as numbers or words.

Variables are the values that are acted upon. Every value needs to be assigned to a specific data, type to make the variable more readable by a computer.
Data type identifies the type of data that the declared variable can hold is. Thus, it indirectly helps the computer to understand what operations need to be performed on those variables.
The declaration of a variable in a program contains two components – the name of the variable and its type.
Let us now understand what are the common data types that we can use in programming:
- Integer
- Floating-point number
- Character
- String
- Boolean
Integer Data Type
Integer data type variables store integer values only. They store whole numbers which have zero, positive and negative values but not decimal values.
Multiple programming languages support different syntax to declare an Integer variable.
If a user tries to create an integer variable and assign it a non-integer value, the program returns an error.
Example of declaring an Integer variable:
int a = 2;
Variables of the integer data type are only capable of holding single values. These variables are not capable of holding a long list of values.
Floating Point Number Data Type
Floating-point numbers are used to store decimal values. They hold real numbers with decimal values.
Depending on the programming language, the syntax to declare floating-point variable changes.
Example of declaring a floating-point number variable:
float a = 1.1;
Character Data Type
Character type variables are used to store character values. Syntax of declaring a character variable is specific to the programming language that you are using. If a user tries to create a character variable and assign it with a non-character value, the program will throw an error.
The character data type is the smallest data type in programming.
Any character value can be declared as a char variable.
Example of declaring a character variable:
char a = ‘w’;
String Data Type
To extend the character data type, a user may have a requirement to store and perform an operation on a sequence of characters. In such cases, the String data type is present to fit the gap. The String data type stores value in a sequence of characters i.e. in String format.
Example of declaring a String variable:
String a = “I am a String Variable”;
Any string value can be declared as a string variable.
Boolean Data Type
There is a subtype of Integer Data Type called “Boolean Data Type”, which stores values in Boolean type only i.e. “true” or “false”. Users can choose between the data types for variables as per program needs and assign variables an appropriate data type.
Boolean is a subtype of integer data type. It stores true and false where true means non-zero and false means zero.
Example of declaring a Boolean variable:
bool a = true;
Naming Rules
As we have understood till now, variables in a programming language are basically like nouns. Every variable in a program is unique. To identify these variables uniquely, the user needs to allocate them a unique name. This name acts as an identifier for that variable. In programming, a user is not allowed to use the same name of a variable more than once.
Naming variables make it easier to call them while performing operations. The name of a variable also suggests what information the variable contains.
Below are some rules for naming a variable:
- A variable name cannot start with a number, it must start with an alphabet or the underscore (_) sign
- A variable name is case-sensitive. Sum and sum are different variables
- A variable can only contain alphanumeric characters and underscore
Creating a Variable in PictoBlox
Let’s see how you can create a variable in PictoBlox. Follow the steps below:
- Open the Variables palette.
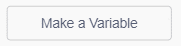
- Select Make a Variable.
- A small dialogue box will appear in the center of the screen asking for the variable name; give it any name of your choice.
- Click OK.
That’s it!
Manipulating a Variable Using Blocks
Now, let’s see how to assign values to a variable, change them, etc.
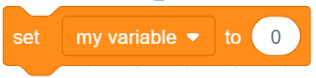
- The set () to () block will set the specified variable to the given value be it a string or number.
- The change () by () block will change the specified variable by a given amount.

- The my variable block simply holds its variable and reports it when the variable is called.
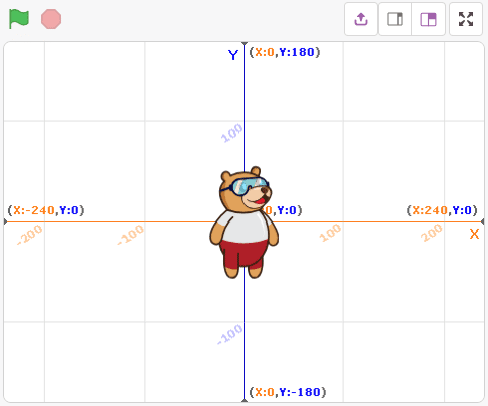
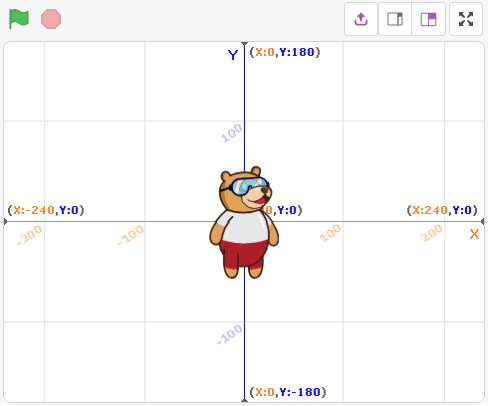
In this activity, we will track the change in Tobi’s position using the up, left, down, and right arrow keys on the keyboard. We will track his X and Y positions using variables.
Follow the steps below:
- Open PictoBlox and create a New File.
- Select the coding environment as Block Coding.
- Create two variables X and Y. We’ll use them for Tobi X and Y positions respectively
- Change the background to Xy- Grid to visualize the position.
- Add the when flag clicked block to start the script.
- Next, set the X and Y positions as 0 by setting the X and Y variables as 0 using the set () to () block.
- Now, add a forever block below the when flag clicked block.
- Then, from the Motion palette, add a go to x:() y:() block and drag and drop the X and Y variable blocks inside it as shown. This will set Tobi’s position to the current value of X and Y.
 Now, to make Tobi move around and track his position, we need to change the values of X and Y. How do we do that? Here’s how:
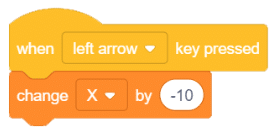
 - To move left, we will change X by -10 whenever the left key is pressed. Add a when () key pressed block from the Events palette and change X by -10 by using a change () by () block.
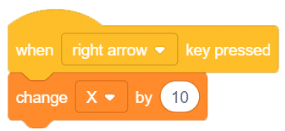
- To move right, we will change X by 10 whenever the right key is pressed. Repeat the above step and select the right arrow key from the drop-down of the hat block and change X by 10 in the change () by () block.
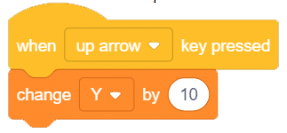
- To move up, we will change Y by 10 whenever the up key is pressed.
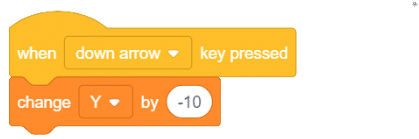
- For down, we will change Y by -10 whenever the down key is pressed
- Now run the script and enjoy it.
- Save the file with the name Tracking a Sprite’s Position Using Variables.
Assignment
Before you move on to the next lesson, a small assignment awaits you!
You must upload the PictoBlox program you created in this activity to the website. Submitting the assignment is a must in order to receive the certificate after completing the course.
Follow the steps below to upload your assignment:
- Click on Browse.
- Search and Select your saved Project file(.sb3) and Click Open.
- Click on Upload to submit the assignment.

Good luck!